If you’re about to refresh a single room or plan a full-home remodel, the interior design planning guide you actually need is one that turns ideas into decisions. This interior design planning guide is built for real homes, with steps that help you define a vision, shape a budget, map a layout, layer lighting, choose materials, and manage installation without losing your sanity or your style.
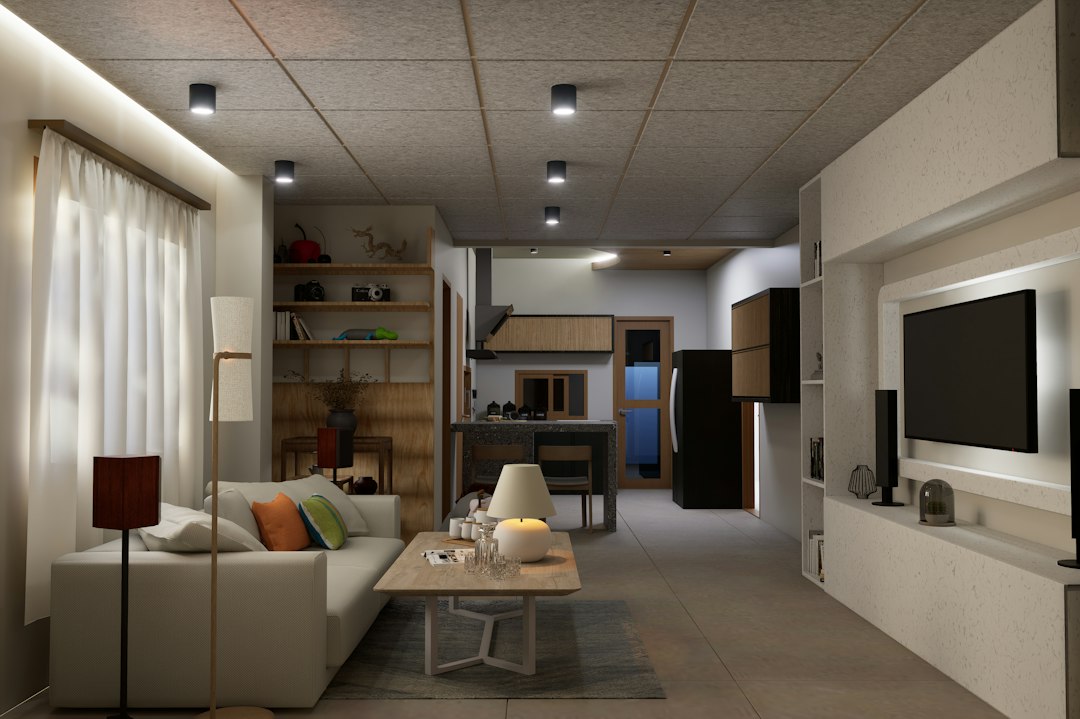
interior design planning guide: quick overview
Every successful project follows a rhythm: clarify intent, set constraints, design inside those boundaries, then execute in a tidy sequence. This overview helps you see the road ahead before you take the first step.
- Vision: define the function and mood of each space; identify non-negotiables.
- Constraints: set an honest budget, timeline, and note building limits and staffing.
- Design: create a simple plan for space, lighting, power/data, materials, and furniture.
- Documentation: gather measurements, drawings, specs, and a product schedule.
- Procurement: order long-lead items early; track deliveries and storage.
- Execution: sequence work to avoid rework; inspect at key milestones.
- Tuning: style, make punch-list fixes, and live-in adjustments.
If you want more planning content, see the Interior Design Planning category on our site: https://joellives.com/category/interior-design-planning/. Bookmark it as a hub for deeper dives and templates.
Define your vision, needs, and constraints
Clarity is a lever. It turns a flood of options into a focused set of choices that fit your life. Start by writing a one-page brief. Include three short lists for every room: function, feeling, and true requirements.
- Function: list daily activities you want the room to hold. Be specific (reading nook, yoga mat zone, console gaming, a quiet workstation, craft table that can stay open).
- Feeling: pick two or three words to anchor mood (calm, airy, cozy, grounded, bright, moody, tactile). These words become guardrails for color, light, and material.
- Requirements: write non-negotiables (queen bed, desk for two, tub for bathing toddlers, dog crate spot, stroller parking, wheelchair turning radius, pantry for bulk storage).
Sketch household patterns next. Who uses each space, at what times, and for how long? Do you host often? Are there late-night readers, early risers, or remote workers who need acoustic privacy? This quick habit map will influence layouts, sound control, and lighting zones more than any trend board.
Now set constraints that keep decisions realistic:
- Budget: Define an all-in figure, then hold back a contingency. For most projects, a 10–15% reserve helps absorb unknowns or minor scope shifts.
- Timeline: Identify immovable dates (holidays, family visits), delivery windows, and any building quiet hours or seasonal restrictions.
- Building limits: Note which elements likely cannot move without permits or heavy work: structural walls and beams; window openings; risers and mechanical trunks; gas lines in kitchen walls.
- Labor approach: Decide where you want to be hands-on vs. where a licensed pro makes sense. Even confident DIYers often delegate electrical or plumbing work.
- Maintenance capacity: Be honest about upkeep. Finishes and fabrics vary widely in care needs; choose accordingly.
Finally, gather inspiration with discipline. Save 10–20 images that capture your intended mood and materials. Name the common threads you see (for example, “oak + linen + matte black hardware” or “graphite tile + walnut + brass taps”). Use those threads to build a starter palette you will test with real samples later. Inspiration supports decisions when it points to a coherent palette, not when it adds another 200 maybes.
Budgeting and scope: get honest early
Budgets are not just numbers—they are planning tools that help you prioritize what matters and avoid stress. Build yours in buckets so you can move funds intentionally when bids or prices come back different than expected.
- Hard costs: Skilled labor for demolition, framing, drywall, tile setting, flooring installation, electrical and plumbing work, painting.
- Materials and fixtures: Flooring, tile, counters, cabinetry, plumbing and lighting fixtures, doors, trim, hardware, paint, adhesives, waterproofing.
- Furnishings and decor: Seating, tables, storage pieces, rugs, window treatments, art, mirrors, bedding, accessories.
- Soft costs: Design, engineering, permits, plan review, delivery, storage, protection, cleaning.
- Contingency: A reserve to cover unknowns or small upgrades that emerge during work.
Assign a range to each bucket and run a few “what if” tests. What if tile costs run 20% higher? What if you repurpose a cabinet and redirect savings to better lighting or a performance fabric? Decide value moves now—standard vanity instead of custom, premade drapery instead of full custom, vinyl plank in a utility room instead of wood—so you are ready to act without panic when numbers shift.
Define scope tiers to protect the core outcome:
- Tier A (must do): Essential work that delivers the main change—new layout, updated lighting and power, flooring, full repaint.
- Tier B (nice to have): Upgrades that improve comfort or storage but could be delayed—built-ins, upgraded countertops, a second layer of window treatments.
- Tier C (only if savings appear): Finishing touches such as upgraded hardware throughout, picture lights, or an accent wall finish.
Bring cash flow into the conversation. Material deposits land long before installation, and progress payments will likely be due at rough-in and trim-out. A simple timeline of when funds leave your account reduces last-minute friction.
Codes, measurements, and simple plans
Good measurements and basic awareness of building rules reduce expensive surprises. Start by documenting each room thoroughly, then translate field notes into simple plans and elevations.
- Tools: A 25-foot tape, a laser measure, a level, painter’s tape, graph paper or a basic app, and a pencil you won’t lose.
- What to capture: Room dimensions; ceiling heights; door and window sizes and swings; sill heights; outlet, switch, and vent locations; radiators or baseboard heaters; stair dimensions; attic access; plumbing and gas stubs.
- Photo log: Shoot each wall straight-on, plus ceiling and floor details. Label photos as you go.
Turn notes into a scaled plan. Hand-drawn is fine—1 square = 1 foot or 1:20 metric. Draw walls, windows, doors, and fixtures. Add key clearances on the plan so they shape decisions from day one: 36 inches for main walkways, 18–24 inches beside a bed, 42 inches from table edge to wall for chairs to move, around 40 inches between kitchen counters in a two-cook galley, and 30 inches free floor space in front of closets.
When work touches structure, egress, stair geometry, electrical, or plumbing, know that codes and permits may apply. Typical requirements include GFCI-protected outlets near water, proper ventilation in baths and kitchens, smoke and CO detectors in specified locations, safe stair dimensions, and tempered glass near certain fixtures. Local rules vary, and licensed professionals or your local authority can advise on specifics for your address and project scope.
Space planning and circulation that feel effortless
Space planning is about frictionless movement and comfortable use. If people aren’t bumping into edges or squeezing past furniture, the room will feel better before you add a single accessory. Work from anchor pieces outward, then draw natural paths between destinations.
- Pick the anchor: Living room anchors are often sofa plus media wall or fireplace; bedrooms center on the bed wall; dining rooms revolve around the table; offices prioritize the desk and daylight.
- Map paths: Trace routes from entries to sitting, working, and storage spots. Keep paths clear and avoid cutting through conversation groupings when possible.
- Balance mass and height: If a tall bookcase dominates one wall, answer it with a visual counterweight: large art, drapery, or another vertical element across the room.
- Use symmetry or purposeful asymmetry: Pairs (lamps, chairs) create calm order. Asymmetry adds energy—just keep the composition balanced.
- Place storage near action: Media gear near the TV, office supplies by the desk, cookware within two steps of the range. Convenient storage reduces clutter.
Test with tape before you buy. Outline sofa and table footprints on the floor with painter’s tape. Walk the space like you will use it: sit down, stand up, carry a laundry basket, swing a door. You will spot pinch points and awkward gaps early and correct them on paper, not with freight returns.
Lighting plan: layer for comfort and capability
Light supports everything you do at home. Design it in layers so rooms shift from focused work to relaxed evenings without harsh contrasts.
- Ambient light: The overall wash from recessed fixtures, ceiling mounts, or cove lighting.
- Task light: Focused illumination where hands and eyes work—reading lamps, under-cabinet strips, pendants or track over a craft surface, vertical fixtures flanking a bath mirror.
- Accent light: Aimed light for depth and character—picture lights, wall washers, toe-kick strips, inside cabinet lighting, small uplights behind plants.
Practical guidelines help:
- Control each layer separately; use dimmers widely to tune for time of day and activity.
- Choose warm-white lamps around 2700–3000K for living areas; 3000–3500K can feel more alert in laundry or utility rooms. Keep tones consistent within a room to avoid patchy color.
- Place under-cabinet strips toward the cabinet front to push light across counters instead of creating shadows.
- In bathrooms, flank the mirror at face height to reduce harsh shadows; add soft overhead ambient, but don’t rely on a single downlight above the mirror.
- Mind glare: use diffusers and shaded fixtures at eye level, and avoid naked bulbs where people sit.
Document your plan: a small drawing with fixture locations, a switching diagram, and a simple schedule listing each fixture’s type, finish, lamp spec, and control method. This reduces site confusion and keeps your orders tidy.
Power, data, HVAC, and smart home considerations
Electric, data, and comfort systems are easiest to finesse on paper. A few early decisions create rooms that feel modern and easy to live in.
- Outlets and switches: Add outlets where you’ll actually plug in—behind side tables, at the end of a kitchen island, inside a vanity drawer for a hair dryer, beside the sofa for a laptop, in the pantry for appliances. Consider outlet heights for accessibility and furniture clearance.
- Low-voltage and data: Plan for a strong Wi‑Fi network. If walls are open, run ethernet to media spots and office desks for reliable streaming and calls. Pull conduit to tricky locations so you can update cabling later.
- HVAC comfort: Keep supply registers away from where drapery will hang; preserve clear return air paths; avoid directing cold supply air straight at seating. If you’re adding built-ins, check they won’t block vents.
- Controls: Group lighting scenes logically—entry, cooking, dining, cleanup, evening. Smart dimmers and switches can help, but a simple, labeled setup is often best. Mount thermostats away from direct sun and drafts.
- Future flexibility: Install blank mud rings and pull strings behind key walls if you foresee motorized shades, a projector, or additional speakers later.
Create a one-page power and data plan: outlet and switch locations, low-voltage runs, device charging stations, and shade power points. Add notes like “switched outlet for tree” near a window or “USB‑C charger in nightstand.” Those tiny details improve daily life more than any single decorative piece.
Materials and finishes: choose for look, feel, and life
Materials make the home tangible. Evaluate them with your five senses and your maintenance threshold.
- Floors: Wood brings warmth and can be refinished; engineered options work well over radiant heat. Luxury vinyl plank is quiet and durable in utility areas. Large-format porcelain gives a crisp look with fewer grout lines. In wet rooms, look for slip-resistant textures.
- Walls: Paint sheen influences maintenance and mood. Matte reads soft and hides small flaws; eggshell cleans more easily; semi-gloss is hardy on trim and doors. Explore limewash or plaster for subtle texture in dry zones.
- Counters: Quartz is even and resilient; natural stone offers movement and unique veining. Test samples against lemon juice, oil, and heat to understand how they may patina over time. Solid-surface allows integrated sinks and nearly invisible seams.
- Cabinetry: Painted fronts feel tailored; wood fronts add depth and variation. Specify soft-close hardware and interior organization—pullouts, dividers, and trays—to make everyday use smoother.
- Textiles: In high-use rooms, consider performance fabrics and removable cushion covers. Combine natural fibers for comfort with durable blends where you need them most.
Build a materials board for each room: flooring sample, paint cards, tile piece, counter chip, cabinet door, fabric swatches, and a metal finish sample. Look at the group in daylight and under your evening lighting. Keep a simple spreadsheet with vendor names, finishes, sizes, lead times, and order dates. When deliveries arrive, verify color lot, quantity, and condition before the return window closes.
Furniture, storage, and ergonomics
Furnishings bring the plan to life. Work large to small: anchor pieces first, then secondary seating, tables, and task furniture. A few dimensions help rooms feel right immediately.
- Seating scale: People vary in comfort. Test seat depth and height. For conversation, aim for 8–10 feet between faces across a coffee table. Keep a 14–18 inch reach from seat edge to table edge.
- Tables: Dining tables are comfortable at 28–30 inches high; plan about 24 inches of width per person. Round tables soften tight rooms and ease circulation.
- Beds and storage: Leave about 24 inches clear on both sides of a double or queen bed. If closet space is tight, a bench with storage or a lift-up bed base can hold linens.
- Work areas: For desks, consider camera backdrop, task light angles, and acoustics. A rug under the desk and a soft panel behind the chair can reduce echo for calls.
- Entries and mud zones: Hooks for daily items, closed storage for the rest, a bench for shoes, and a tray for keys. Put the hamper where shoes actually come off to help the routine stick.
Before ordering, confirm max dimensions, lead time, delivery method, and access constraints (elevator size, stair width, door swings). For custom pieces, sign off on shop drawings and finish samples. Record fabric cleanability and any care guidance so you can maintain finishes without guesswork.
Color, window treatments, acoustics, and cohesion
Color, daylight control, and sound comfort tie a home together as much as furniture does. A cohesive strategy balances continuity with variety.
- Color roadmap: Pick one or two home-wide base colors for walls and ceilings, then add 2–3 accents that echo materials (oak, brass, charcoal, clay, ink blue). Vary intensity by room: deeper in cozy spaces, lighter in areas that need lift.
- Sampling: Paint large samples on foam board and move them around at different times of day. Turn on evening lighting when testing; artificial light shifts how colors read.
- Window treatments: Pair a light-filtering layer (sheer or solar shade) with a blackout or lined drape where you need darkness. Plan stack-back space so drapery clears glass and doesn’t block heat registers.
- Glare and heat: In south- and west-facing rooms, consider solar shades or lined drapery; in bedrooms, blackout plus a small night light on a dimmer creates both darkness and safety.
- Acoustics: Hard surfaces bounce sound. Add a rug large enough to touch major furniture, lined drapery, upholstered pieces, bookcases, and soft wall panels or art with acoustic backing. Seal large door gaps if noise travels between rooms.
- Repetition with variation: Repeat one or two metals throughout (for example, black door hardware and black lighting), echo a curved form from mirrors into a coffee table, and keep wood tones in a compatible family. Repetition brings rhythm; variation keeps it lively.
Room-by-room planning playbook
Turn principles into action with concise checklists. Adjust for your home and lifestyle.
Entry and circulation
- Drop zone: hooks, tray or bowl, and concealed storage to reduce visual noise.
- Lighting: ceiling mount on a dimmer plus a small lamp near the door or on a console.
- Rug: low-pile, easy-clean, sized to catch dirt inside the threshold.
- Mirror: quick last look, plus visual expansion in small foyers.
- Shoes and pets: closed storage for shoes; a lidded bench if curious paws investigate.
Living room
- Anchor: sofa placement that respects traffic paths and daylight.
- Conversation: seating for the usual group, plus stools or a bench for guests.
- Lighting: ceiling fixtures on dimmers, two or three lamps at different heights, one accent light.
- Media: confirm outlet and data jack locations before walls close; manage cable routes.
- Acoustics: area rug, lined drapery if needed, and upholstered seating to soften echo.
Dining room
- Table: size for everyday use; extendable when space is tight.
- Clearances: about 42 inches from wall to chair backs when possible.
- Lighting: centered pendant on a dimmer; add a buffet lamp for warmth.
- Storage: closed for linens and rarely used pieces; open for display only if you enjoy curating.
Kitchen
- Zones: prep by the sink, cooking at the range, cleanup at the dishwasher, and storage grouped by use.
- Counter specifics: standard heights around 36 inches; consider a 30-inch kneading zone if you bake often.
- Lighting: under-cabinet task, ceiling ambient, and pendants over the island or table.
- Ventilation: confirm duct route early; test an under-cabinet light for glare before ordering a long run.
- Backsplash: extend behind often-used small appliances for easier cleaning.
Bedroom
- Bed wall: center the headboard when possible; size nightstands to mattress height.
- Circulation: about 24 inches on each side; add a bench or ottoman for dressing.
- Light layers: soft ceiling light on dimmer, bedside task lighting, and one small accent like a picture light.
- Window treatments: blackout where needed; sheers for daylight privacy.
- Closet: mix double-hang, long-hang, and drawers; add a couple of shallow shelves for shoes.
Kids’ spaces
- Flex zones: open floor space for play now; later, it can hold a desk or reading chair.
- Durability: washable paint, performance fabrics, and a rug that hides snacks and art projects.
- Storage: labeled bins at kid height; sturdy shelves with wall anchors.
- Lighting: warm ambient plus plug-in task lights for reading or building projects.
Home office
- Backdrop: a calm wall, bookshelf, or art you like to see on video calls; hide cables in the frame.
- Task lighting: an adjustable lamp set at about 30–45 degrees to the work surface.
- Acoustics: rug on the floor, a soft panel behind your chair, and a door sweep if sound leaks.
- Ergonomics: chair height so forearms rest level with the desk; monitor top near eye height.
Bathroom
- Layout: maintain an open zone in front of vanity and toilet; check shower door swing clearances.
- Lighting: vertical sconces flanking the mirror plus ambient overhead.
- Storage: recessed medicine cabinets or shallow shelves for daily items; closed storage for bulk goods.
- Tile and grout: slip-resistant floors; choose grout color with cleaning in mind.
Laundry and utility
- Surfaces: a counter for folding, a rod for hanging, and shelves or cabinets for products.
- Water considerations: pan under machines and accessible shutoffs; a floor drain if feasible.
- Vent path: confirm dryer vent route and clearances early.
Outdoor and balcony
- Seating: compact pieces that don’t block doors or pinch circulation.
- Shade: umbrellas or shades for afternoon sun; simple string or solar lights for evening ambience.
- Planters: group in odd numbers; mix evergreen structure with seasonal color.
Working with professionals, procurement, and DIY boundaries
The right team and clear roles keep projects calm. Decide early where expert help adds value and where you’re comfortable taking the lead.
- When to hire: Structural changes, electrical or plumbing reconfiguration, waterproofing, complex tile layouts, and permitted work usually benefit from experienced trades. A designer can coordinate selections, drawings, orders, and site communication.
- Define scopes: For each vendor, write what they will deliver, what you will decide by when, and how payments work. Keep a shared schedule of information needed dates.
- Procurement: Build a product schedule listing every item, vendor, finish, dimensions, and lead time. Order long-lead items first. Inspect deliveries on arrival and store safely.
- DIY sanity checks: Be honest about tools, time, and patience. If you want to install your own LVP floors, test a small closet first. If it goes smoothly, scale up.
- Communication cadence: Weekly check-ins with photos of field conditions keep decisions moving and reduce surprises.
From plan to reality: sequencing, procurement, and maintenance
A clear sequence prevents rework and busted timelines. Even modest projects benefit from a one-page order of operations.
- Typical order: site protection; demolition; framing and rough carpentry; rough-in for electrical and plumbing; insulation where applicable; drywall and skim; prime; flooring; tile; paint; cabinetry; trim and doors; electrical and plumbing trim-out; fixtures and hardware; final paint touch-ups; furnishings and styling.
- Inspections and deliveries: Put permit inspections and delivery windows on the same calendar. If a vanity ships late, swap tasks (paint ceilings, assemble storage) rather than idling.
- Punch list: Blue tape walk-throughs identify touch-ups, alignment issues, missing parts, or squeaks. Track items to closure in a shared list.
Set yourself up for easy ownership with a slim maintenance plan:
- Care cards: Keep one folder (digital is fine) with fabric cleaning codes, floor care notes, stone and wood care routines, and lighting lamp specs.
- Spare parts: Save a box with extra tile, paint labeled by room and sheen, a few cabinet hardware pieces, and a small coil of matching caulk or grout.
- Seasonal rhythm: Twice a year, check caulk lines, tighten loose hardware, wash shades and filters, oil door hinges, and touch up high-traffic paint.
- Post-occupancy tweaks: After a few weeks, adjust dimmer presets, relocate a lamp for glare, add a tray where clutter gathers, or swap a too-small rug for the right size. Small changes make daily life feel smoother.
Good planning protects your budget and your patience. A tidy brief, a simple plan, measured drawings, a thoughtful lighting and power scheme, and a realistic schedule form a repeatable process you can use room by room across the entire home. Build from that foundation and you’ll make confident, timely decisions that hold together beautifully when the last box is recycled.