If you’re starting from scratch or upgrading a small backyard plot, raised bed gardening makes the whole process simpler, more organized, and easier on the knees. In this guide you’ll learn everything needed to plan, build, fill, plant, water, and maintain productive beds through a full year. The goal is practical confidence: how to choose materials, mix soil that drains well, map crops, set up drip lines, and keep problems small before they become time sinks—all tailored to raised bed gardening.
What raised beds solve—and where they fall short
Raised beds change the rules of home food growing. By lifting soil above native ground level, you create a defined box that drains predictably, warms sooner in spring, and stays loose with far less compaction. The rectangular footprint acts like a template for planning and spacing. Paths stay paths. Plants stay planted where you intended. Because you never step on the bed, the soil structure becomes naturally crumbly and easy to work with a hand fork instead of a shovel.
There are other advantages. A raised bed concentrates amendments in a smaller volume, so your investments in compost and mineral inputs go further. Edging keeps mulch neatly in place, suppressing weed pressure from path areas. Framed sides can support low hoops for season extension or insect netting. And if your native soil is rocky, sticky, heavily clay, or contaminated (old lead paint near foundations is common in older neighborhoods), lifting the growing zone lets you start with a clean, engineered medium.
Limits do exist. Beds dry out faster than in-ground plots, particularly in hot, windy, or sandy locations. The up-front cost of lumber, metal, or block can be meaningful. Warm-season crops like indeterminate tomatoes or vining winter squash may outgrow small beds without trellises or thoughtful training. And beds are not magic; poor planning, overcrowding, and irregular attention can still lead to meager harvests. The key is designing for your climate, your time budget, and your menu.
Measure twice: size, height, and layout that fit you and your space
Start with how you’ll move. Most people can comfortably reach about 2 feet from one side, so a 4-foot-wide bed is the classic standard when you can access both sides. Against a fence or wall, limit width to 2–3 feet. Length is flexible; 6–12 feet is common because it suits off-the-shelf lumber and keeps irrigation simple. Height determines comfort and moisture behavior: 8–12 inches is adequate for most crops when built over loosened native ground, 16–24 inches suits root vegetables and reduces bending, and 30 inches transforms access for anyone with mobility concerns.
Map the yard like a small blueprint. Track sun patterns (or use a smartphone sun-path app) to locate at least six hours of direct light for fruiting crops. Observe wind corridors and low spots that collect cold air. Place paths 18–30 inches wide to push a wheelbarrow and kneel comfortably. Align long bed sides east–west if you want more even light on both sides for symmetrical plantings, or north–south if you prefer tall crops on the north edge to avoid shading shorter plants.
Make layout choices that simplify maintenance. Group beds by water needs to share a drip zone. Leave space for staging compost and storing stakes. When possible, place a hose bib or rain barrel within easy reach to reduce hauling. If you plan protection, ensure your bed dimensions match common hoop and netting sizes. A well-thought cluster of two to four beds keeps everything close enough that routine five-minute tasks truly stay five minutes.
raised bed gardening: tools and materials checklist
Before construction day, assemble the basics. Having everything at hand turns a weekend project into a single, satisfying push.
- Bed materials: rot-resistant lumber (cedar, cypress), powder-coated steel panels, composite boards, or masonry blocks
- Fasteners and hardware: exterior screws, corner brackets, and galvanized or stainless options for longevity
- Ground prep: rake, digging fork or broadfork, landscape staples, and cardboard for a weed-suppressing base
- Soil components: finished compost, high-quality topsoil, coarse mineral texture (pumice, perlite, or coarse sand), and organic matter like shredded leaves
- Mulch: arborist wood chips for paths, straw or shredded leaves for bed surfaces
- Irrigation: drip tubing, emitters or dripline, filter, pressure regulator, and a battery timer
- Measuring and layout: tape measure, string lines, square, and level
- Planting tools: hand trowel, hori-hori knife, scissors or pruners, and a watering wand
- Protection: UV-stable insect netting, row cover, clamps, and 1/2-inch EMT conduit or PVC for hoops
Optional but helpful items include a soil scoop for blending mixes, a small bucket for amendments, a soil moisture meter to learn new beds, and labeled stakes for tidy row identification. If you’re repurposing materials, verify that any recycled timber is untreated or at least modern, non-arsenic pressure treatment; line the inside with thick landscape fabric if you’re unsure.
Build or buy: wood, metal, masonry, and no-dig options compared
There’s no single “best” bed; there’s the best for your goals, budget, and climate. Cedar and cypress are popular because they resist decay naturally without chemical treatment; expect 8–12 years of service depending on moisture. They’re easy to cut and assemble with standard tools, and wood feels warm and classic. Powder-coated or galvalume steel kits offer thin walls that maximize internal soil space. They last a decade or more, assemble quickly with bolts, and handle curves if you like soft shapes. In hot climates, light-colored panels moderate heat compared to dark colors.
Masonry—concrete blocks, pavers, or mortared walls—creates permanent structures with high thermal mass. They can extend the season by storing daytime warmth, but they require more labor and often a footing for tall builds. Composite boards combine recycled plastic with wood fibers; they’re stable and maintenance-light, though some bowing can occur without mid-span bracing on long runs. If money is tight or you prefer a low-embodied-energy approach, a “no-dig” bed built with layered cardboard, compost, and mulch (sometimes called a sheet-mulch or lasagna method) can be started without rigid sides; add a frame later if desired.
Assembly basics are similar across materials: square the corners, level the perimeter, stake or screw to keep joints tight, and anchor tall beds against wind. For wood, pre-drill to prevent splitting and consider corner posts that rise slightly above the rim for tying hoops. For metal kits, use the provided bracing, snug bolts, and consider a top cap board for a comfortable seat and thermal buffer.
Soil systems that work: recipes, volumes, and affordable fills
The magic of raised beds is a custom soil blend. Think “well-drained, nutrient-rich sponge.” In practice, that means a structure with pore spaces for air and water, organic matter for life and moisture-holding, and coarse particles for drainage. Here are three reliable approaches that scale from premium to frugal.
Premium, ready-from-day-one mix
Blend roughly 40 percent high-quality screened compost, 40 percent weed-free topsoil, and 20 percent coarse texture (pumice, perlite, or coarse sand). Add 1–2 cups of a balanced organic granular fertilizer per cubic foot as a starter and a dusting of rock minerals if your compost comes from a narrow feedstock. This mix stays fluffy, drains well, and supports roots immediately.
Value mix using what you have
Combine 50 percent topsoil, 25 percent compost, and 25 percent shredded leaves or partially aged arborist chips that have started to break down. The extra carbon moderates moisture and, when layered with nitrogen-rich compost, supports a thriving soil food web. Top the bed with 1–2 inches of finished compost as a feeding layer and mulch thickly to reduce surface drying.
Log-and-layer core (Hügel-style hybrid)
For tall beds where bulk fill is expensive, create a wood core: coarse logs, sticks, and prunings at the bottom; then a layer of leaves and straw; then your chosen mix for the top 10–12 inches. The woody base slowly decays, acting like a reservoir for moisture while saving on purchased soil. Keep the upper layer deep enough for root crops and greens.
How much soil? A 4×8 bed at 12 inches tall holds roughly 32 cubic feet (about 1.2 cubic yards). Online volume calculators help when combining materials from different sources. After the first watering cycles, soil will settle a bit; top off with additional compost or your base mix to restore the rim-to-soil distance you prefer.
Water like a pro: from cans to drip grids and timers
Raised beds dry out faster, so consistent watering is the difference between sluggish plants and vigorous growth. Hand watering works for small beds if you can water deeply and regularly. Use a wand with a gentle shower head and water until the top 6–8 inches are moist; it usually takes longer than you think. In hot spells, morning watering steadies plants for the day, and a second light pass in the evening can help newly seeded areas stay evenly moist.
For most gardeners, drip irrigation is the best balance of precision and time savings. Two common patterns work well: (1) parallel drip lines spaced 8–12 inches apart down the length of the bed, or (2) a grid of 1/4-inch lines snaked back and forth every 6–8 inches for salad beds with dense plantings. Add a simple filter, pressure reducer, and battery timer at the spigot. Run longer, less often for deep roots in established crops; run shorter, more frequently for new transplants and seeded beds until roots expand.
Mulch is a water manager’s secret. After planting, lay 1–2 inches of straw or shredded leaves around crops, keeping a small gap around stems. The mulch shields soil from sun and wind, reduces evaporation, and moderates surface temperatures. In very hot regions, light shade cloth over hoops during heat waves can protect tender greens and reduce stress.
Plant with intention: spacing, succession, and simple companion maps
Clear spacing simplifies raised beds. Instead of rows, think in grids. A common pattern is four rows across a 4-foot bed for medium crops, three for large crops, and five to six for salad crops. Use a simple planting board with dowel holes or a string grid to keep spacing consistent: lettuce at 8–10 inches, kale at 12–18 inches, bush beans at 6–8 inches, carrots at 2 inches in wide bands you thin later. Tighter spacing combined with regular harvests keeps beds full and weed pressure low.
Succession planting turns one bed into a season-long buffet. After early peas, follow with bush beans. After spring spinach, tuck in basil and dwarf tomatoes. Harvesting outer leaves from greens every few days opens light for inner leaves, and a quick top-dress of compost around heavy feeders like tomatoes replenishes nutrients midseason. When something finishes, add a scoop of compost, re-level, and plant the next crop within a day or two.
Companion planning for beds is practical, not mystical. Pair tall, narrow crops that can be trellised on the north side (tomatoes, cucumbers) with shorter sun lovers (peppers, basil) to the south. Run a border of flowers like calendula or nasturtiums to draw bees and add color. Avoid packing cousins from the same plant family too closely for too long in a season—diversity breaks up pest cycles. Keep a simple map in a notebook so you remember what worked and what felt crowded.
A full-year calendar for the beds: tasks by season and month
Small, regular actions beat big weekend bursts. Here’s a rhythm you can adapt to your zone. If you’re new to local timing, ask neighbors or a nearby nursery for your last and first frost dates, then line up these tasks relative to those anchors.
Late winter to early spring
Top each bed with 1–2 inches of finished compost and re-level. Check irrigation lines for cracks or clogs. Direct-sow cool-season staples (spinach, radish, peas) as soon as soil can be worked. Under hoops with row cover, you can push the season by 2–4 weeks. Start transplants indoors for broccoli, kale, and lettuce. Set slug traps and keep the bed surface tidy with mulch to moderate temperature swings.
Mid to late spring
After the last frost window, transplant tomatoes, peppers, basil, and squash. Install trellises before plants need them so you never have to weave a jungle. Lay drip lines and test the timer. Side-dress heavy feeders with compost after they root in for two weeks. Succession-sow salad greens and bush beans every two to three weeks for a steady supply.
Summer
Water consistently. In hot spells, check moisture with your finger knuckle-deep and adjust run times. Keep blossoms coming by harvesting beans and cucumbers while small and tender. Trim tomatoes lightly to improve airflow and tie vines to keep fruits off soil. If a bed is empty for more than ten days, sow a quick cover like buckwheat to hold moisture and invite beneficial insects.
Late summer to fall
As summer crops slow, clear residues and replant with fall greens: arugula, spinach, Asian greens, and lettuce. Carrots and beets sown in late summer sweeten in cool air. In areas with early frosts, set hoops and row cover ahead of the first cold snap so you can pull fabric quickly at dusk. Mulch paths with fresh wood chips to control splash and keep the garden tidy going into winter.
Late fall to winter
Feed beds, not bins. Spread leaves over bare soil and top with a little compost so they don’t blow away. Sow winter cover crops if your climate allows; rye with vetch or peas supports soil life. Drain or insulate hoses and timers. Clean pruners and bundle stakes. Reflect on what you loved and what you’ll change, and sketch next year’s layout while memory is fresh.
Keep problems small: weeds, nutrients, insects, and weather
Most headaches shrink when your system favors steady growth. A few habits go a long way. Mulch exposed soil quickly to lower weed germination. Hand-pull intruders when tiny; it’s seconds of work then, minutes later. If soil looks crusted after heavy rain, scratch the surface gently with a hand fork to restore air flow without deep disturbance.
Nutrient drift shows up as pale leaves or sluggish growth. Before reaching for a product, check basic care: Is watering even? Are roots crowded? Did you recently harvest heavily and forget to top-dress? In many cases, a half-inch of compost around active plants and a refreshed mulch layer will help the bed rebound. For plants that request extra calcium or magnesium in your region, a light sprinkle of crushed eggshell powder or a pinch of Epsom salt at planting time can support balance; keep amounts modest and observe plant response rather than chasing a formula.
Insects will visit a vibrant garden. The goal is to encourage balance. Floating insect netting over hoops keeps cabbage moths from laying eggs on brassicas. Hand-pick larger pests during your morning walk with a coffee in hand. Encourage beneficial insects with a little diversity—dill, fennel, alyssum, and native flowers mixed along borders provide nectar and shelter. Healthy plants in well-drained soil bounce back faster from nibbles than stressed plants in soggy or compacted beds.
Weather throws curveballs. Sudden heat can stall lettuces; provide temporary shade with cloth or a light row cover. Unseasonal cold can be buffered with fabric or a clear plastic low tunnel; open ends when the sun returns to avoid overheating. Heavy rain and wind are tamed by mulched surfaces, firm trellises, and quick inspection after storms to upright any toppled stems.
Maintenance routines that actually save time
Instead of marathon chores, adopt micro-routines. Every time you harvest, remove tired leaves. Every time you water by hand, pop out a weed or two. Once a week, walk the beds with a small bucket and a pair of pruners: top-dress bare spots with a scoop of compost, clip away anything shading a neighbor, tuck a few seeds in open pockets. This “little and often” style keeps every problem small and keeps the garden enjoyable.
Monthly, check the timer batteries, inspect filters, and flush drip lines. Midseason, replenish mulch where soil begins to show. At season turn, add compost or leaf mold so soil life has something to chew on during downtime. Keep stakes, clamps, and netting bundled in a labeled bin so setup is frictionless next time. Label plants with durable tags; six weeks from now you’ll be glad you did.
Budget and sustainability playbook
Great beds don’t require a big spend. Look for arborist chips delivered free for paths; many tree services are glad to drop a load. Gather fall leaves in breathable bags to create a leaf mold stash—black gold for water-holding. Watch local classifieds for leftover bricks or pavers to edge paths. Use 2×6 offcuts as internal cross-braces in long wooden beds to reduce bowing.
Water efficiency is a sustainability keystone. Pair a simple rain barrel with your drip setup for short cycles on salad beds, reserving municipal water for deep watering long-rooted crops. In dry climates, sweep paths instead of hosing. Choose varieties bred for your region’s stresses; a heat-tolerant lettuce or crack-resistant tomato often performs better than a famous heirloom that struggles under your conditions.
Soil is a living bank account. Keep depositing organic matter—compost top-dresses, leaf litter, and periodic cover crops—even while you harvest withdrawals of food. Resist the urge to overwork the soil; gentle surface cultivation protects structure. Over time, you’ll notice beds growing more forgiving and plants growing more resilient with less input.
Example layouts: salad, salsa, and pollinator-friendly beds
Starter layouts make the first season straightforward. Use these as sketches you can tweak once you meet your microclimate.
Salad bed (4×8 feet, spring through fall)
- North edge trellis: two 10-foot rows of snap peas (spring), then cucumbers (summer)
- Center rows: alternating bands of lettuce (8-inch spacing), spinach (6-inch spacing), and arugula (broadcast band), re-sown every 2–3 weeks
- South edge: scallions every 3 inches and radishes tucked between early lettuce for quick harvests
- Mulch paths and keep drip grid at 6–8 inch spacing for even moisture
Salsa bed (4×8 feet, summer)
- North trellis: two indeterminate tomatoes with lower leaves pruned for airflow
- Mid-bed: two rows of peppers (sweet or hot) at 16–18 inches
- South border: cilantro sown repeatedly in partial afternoon shade and a row of scallions
- Understory: basil between tomatoes after they’re established
Pollinator-friendly bed (4×8 feet, season-long color)
- Back row: sunflowers or tithonia (Mexican sunflower) for height and late-season nectar
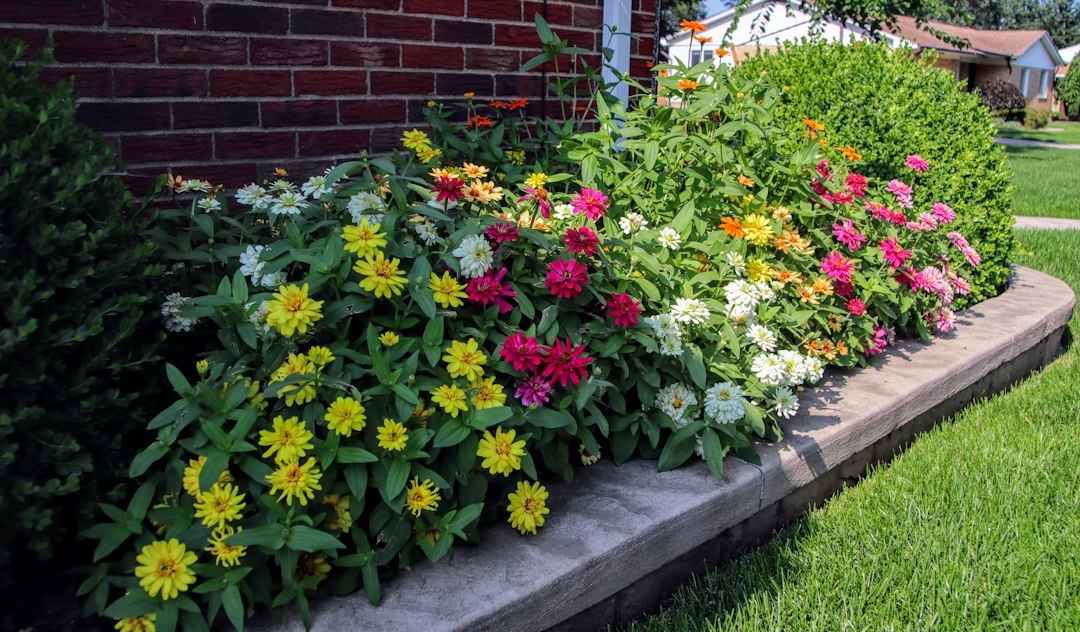
- Middle: zinnias and cosmos for continuous blooms
- Front edge: calendula, alyssum, and nasturtiums to spill over and invite beneficials
- Open pockets: herbs like thyme and oregano to bridge gaps with nectar
Rotate families by bed from year to year so tomatoes don’t follow tomatoes, and brassicas don’t follow brassicas. In small gardens you can still rotate by half-bed or even by side of a trellis to break patterns.
Troubleshooting: quick answers to common raised bed questions
My soil settled a lot after the first few waterings. Did I do something wrong? Settling is normal as air pockets collapse. Top up with your base mix or compost to restore the working depth. A gentle soaking helps layers knit together.
Do I need landscape fabric under the bed? In most cases, a thick layer of overlapping cardboard under the frame suppresses existing weeds, softens quickly, and invites earthworms. Use fabric only if you have tenacious rhizomes creeping in from paths, and even then monitor drainage.
Are metal beds too hot? Light-colored panels stay surprisingly moderate, especially with mulch. In full-sun, hot-summer climates, keep at least a few inches between metal walls and plant roots, and lean toward morning watering in heat waves.
What about cats, birds, or neighborhood wildlife? Hoops with netting protect seedlings, and fragrant herbs along edges often reduce curiosity. If burrowing pests are common, staple hardware cloth across the bed bottom before filling.
How do I keep track of what I planted? Keep a simple map in a notebook or snap photos after each planting. Label rows with weatherproof tags. Over time, you’ll learn which layouts fit your habits and harvest goals best.
Your next small step
Pick a spot, choose a bed style, and build one. The first harvest you pull from a small, well-designed bed rewires how you think about fresh food and yard space. If you want more ideas and down-to-earth projects like this, explore the Garden Life stories at joellives.com and sketch the layout that will make your next season easier than the last.