A low-maintenance pollinator garden can bring color, movement, and seasonal interest to your yard while providing nectar, pollen, and shelter for bees, butterflies, moths, beetles, and hummingbirds. This guide shows you how to design, plant, and care for a low-maintenance pollinator garden you can enjoy without constant weeding, watering, or fussing. You will learn how to read your site, pick hardy plants (many native), layer them for year-round bloom, and set up a simple routine that keeps things thriving with minimal effort.
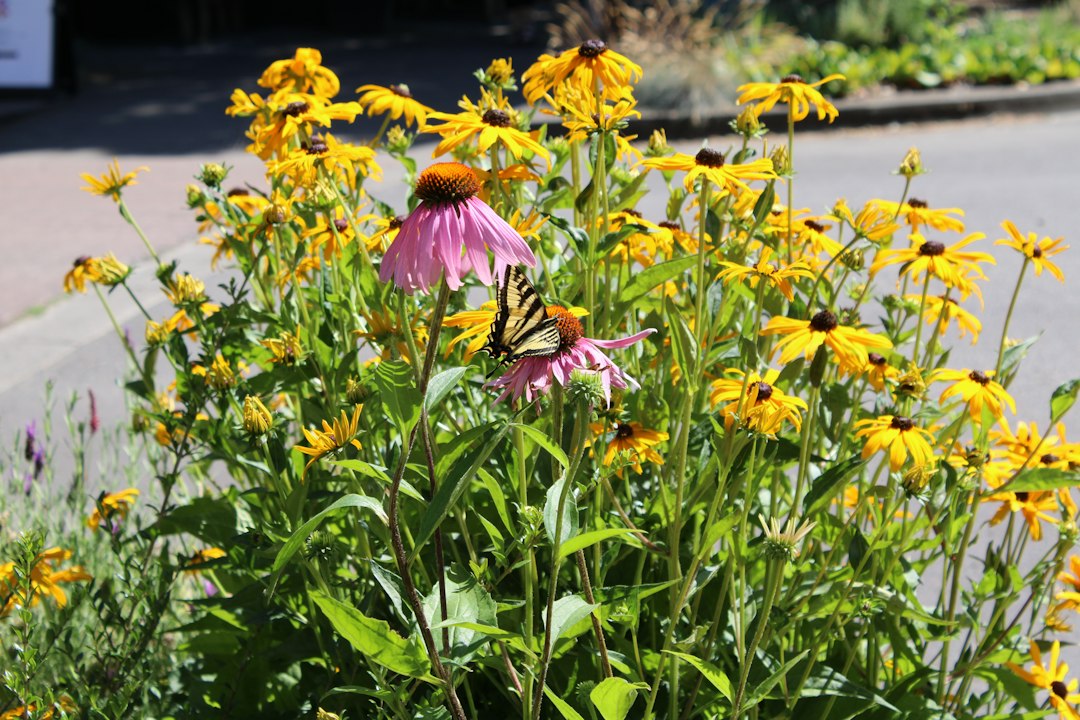
Why low-maintenance matters for pollinator gardens
Pollinator gardens are meant to be alive, dynamic, and slightly wild. That doesn’t mean they have to be high-effort. The “low-maintenance” mindset is about designing a garden that mostly runs itself. You leverage the right plants for your climate and soil, build healthy soil, reduce irrigation needs, and design plant communities that suppress weeds. Instead of spending weekends battling issues that were designed into the garden, you nudge a resilient system that balances itself across seasons.
Low-maintenance gets practical when you focus on four pillars: fit, coverage, simplification, and rhythm. Fit means matching plants to sun, soil, and water realities. Coverage means occupying as much bare ground as possible with living plants and mulch so unwanted plants find fewer footholds. Simplification means repeating proven plant combinations and relying on a small, trusted palette rather than a constantly changing mix. Rhythm means setting a short, seasonal routine—small, predictable tasks that keep everything humming without sprawling to-do lists.
If you think “low-maintenance” equals zero work, that’s unrealistic. But a few hours per month during the growing season and a short tidy-up in late winter or early spring can keep a well-designed pollinator garden in shape. You spend more time watching butterflies and less time dragging hoses.
Start with the site: sun, soil, water, and wind
Every successful garden begins with good observation. Before buying a single plant, walk your yard and jot notes for a full week. Where does the sun hit morning, noon, and late afternoon? Which areas remain shaded? How does water move during rain? Where does it puddle, and where does it drain? Is your site breezy, sheltered, or somewhere in between? These answers shape your design and plant choices.
Sun exposure dictates bloom performance. Most nectar-rich, floriferous perennials want at least six hours of direct sun, though many shade-tolerant woodland species support pollinators, too. If you have a mix, divide your plan into sun and shade zones instead of forcing plants to perform outside their comfort zone. Soil texture matters as well. Sandy soils drain fast and often need drought-tolerant species. Clay soils hold water and suit plants that accept heavier conditions. Loams are forgiving, but even then, what’s native to your region is usually the easiest path to low-effort success.
Water is the biggest long-term cost in many gardens. Observe where roof downspouts, swales, or natural grade can deliver water passively to planting areas. In small yards, you may route a downspout to a shallow basin in the garden. In larger spaces, a gentle swale can slow and soak water into the root zone. Wind exposure influences plant height and staking needs. If your site is windy, select sturdy, clump-forming perennials and grasses and place taller species where they’re buffered by hedges, fences, or shrubs.
Take a quick soil test through a local extension service to understand pH and organic matter. Most prairie-style and meadow-style plantings thrive in average soils; heavily amended, nutrient-rich beds can invite floppy growth and weed outbreaks. Low-maintenance gardeners often favor moderate fertility, strong sun, and mulch to support a dense, competitive plant community that deters unwanted seedlings.
Design basics: patterns, layers, and simple geometry
Designing a resilient pollinator garden doesn’t require an art degree. Think in terms of patterns and layers. Patterns keep the garden cohesive: repeat the same two or three plant groupings across the bed so your eye reads it as a whole. Layers keep it functional: groundcovers block light from weed seeds, mid-height bloomers provide nectar and color, and taller accents create structure for insects and visual rhythm.
Start with a simple shape. A rectangle or oval bed with a crisp edge is easier to maintain than a wavy outline that’s hard to mow around. Define a walking path or stepping stones through the bed so you can access the center without compacting soil. Choose a focal point for anchoring the composition—this might be a small ornamental tree, a grouping of taller grasses, a bird bath, or a boulder. From there, repeat plant clumps in a checkerboard or drift pattern to fill space and establish a clear visual beat.
For low-maintenance, plant in multiples. Singletons scattered all over invite patchiness and gaps. Clumps of three, five, or seven create coverage quickly and help plants outcompete weeds. A typical 100-square-foot bed might use three groundcover species repeated throughout, three mid-layer perennials, two tall structural species, and a handful of bulbs for early-season nectar. Fewer species, used more times, is easier to manage and still supports diverse insects when those species are chosen thoughtfully.
Plant palette by region: natives and tough allies
Choosing plants that evolved in your region reduces effort. Native species tend to match local soil, rainfall, and seasons, and they often provide better resources to native bees and butterflies. That said, low-maintenance doesn’t require a purist’s approach—sturdy, non-invasive, regionally adapted perennials can contribute reliable color and nectar. Always avoid invasive species, and check local lists as rules and recommended species differ regionally.
To get you started, here are adaptable, widely loved plants grouped by broad zones. Confirm local suitability with your extension office or native plant society. The idea is to build a short list that fits your sun, soil, and water reality, then repeat those winners.
- Upper Midwest and Northeast (full sun beds): black-eyed Susan (Rudbeckia hirta), purple coneflower (Echinacea purpurea), bee balm (Monarda didyma), anise hyssop (Agastache foeniculum), little bluestem (Schizachyrium scoparium), New England aster (Symphyotrichum novae-angliae), showy goldenrod (Solidago speciosa), and prairie dropseed (Sporobolus heterolepis).
- Mid-Atlantic and Southeast (sun to part sun): blanketflower (Gaillardia aristata), narrowleaf mountain mint (Pycnanthemum tenuifolium), swamp milkweed (Asclepias incarnata) in wetter spots, lanceleaf coreopsis (Coreopsis lanceolata), narrowleaf sunflower (Helianthus angustifolius), scarlet sage (Salvia coccinea), and muhly grass (Muhlenbergia capillaris).
- Great Plains and Intermountain West (sun, lean soils): blanketflower, yarrow (Achillea millefolium), Rocky Mountain bee plant (Peritoma serrulata), showy milkweed (Asclepias speciosa), penstemon species, blue grama (Bouteloua gracilis), and rabbitbrush (Ericameria nauseosa).
- California and Pacific Northwest (summer-dry): California poppy (Eschscholzia californica), tidy tips (Layia platyglossa), seaside daisy (Erigeron glaucus), Douglas aster (Symphyotrichum subspicatum), Oregon sunshine (Eriophyllum lanatum), native salvias, and tufted hairgrass (Deschampsia cespitosa).
- Southwest and desert margins (full sun, low water): desert milkweed (Asclepias subulata), globe mallow (Sphaeralcea ambigua), penstemon (e.g., P. eatonii), chuparosa (Justicia californica), brittlebush (Encelia farinosa), and native Salvia species.
- Shade and dappled light (woodland edges): columbine (Aquilegia spp.), foamflower (Tiarella cordifolia), wild ginger (Asarum canadense), blue violets (Viola spp.), Solomon’s seal (Polygonatum spp.), and woodland phlox (Phlox divaricata).
To keep things simple, pick one grass or grass-like plant to weave through the bed, two to three mid-height for color, one to two tall species, and a groundcover. Layer-in a milkweed for butterfly larvae if appropriate to your region, and include late-season asters or goldenrods for fall forage. The mix supports a wide range of pollinators while remaining straightforward to manage.
Bloom calendars: plan succession for the long season
Succession is the quiet hero of a low-maintenance design. By ensuring something is blooming from early spring through late fall, you help pollinators when they need resources most and avoid long gaps that invite weeds. The simplest method is to arrange your plant palette into early, mid, and late bloomers and then repeat at least one from each group throughout the bed.
In many climates, bulbs such as crocus, grape hyacinth, and species tulips open the season. Early perennials like woodland phlox and columbine offer nectar before summer arrives. Mid-season powerhouses such as coneflowers, bee balms, salvias, and coreopsis carry the summer load. Late bloomers—asters, goldenrods, and certain native sunflowers—bring the final push into fall. Herbs like oregano, thyme, and chives offer bonus nectar if allowed to flower, all while doubling as kitchen staples.
Map your choices on a simple calendar. If you notice a gap in April or September, adjust by adding a plant known to flower then. This exercise avoids the common scenario where everything peaks in June and looks bare by August. It also reduces the urge to tinker constantly since you’ve pre-arranged color and forage across the season.
Irrigation and mulch: efficient systems that save time
Watering strategy often determines whether a garden stays low-maintenance. The ideal setup uses simple, low-flow irrigation only during establishment and during extended dry spells. Drip lines, soaker hoses under mulch, or a modest hand-watering routine at the base of new plants help roots dive deep. After the first season, most regionally appropriate perennials need far less water.
Mulch is your friend, but choose wisely. Two to three inches of shredded wood mulch suppresses weeds and protects soil moisture in the first year. In lean, dry climates, a thin gravel mulch can mimic native conditions and discourage weed seedlings. In dense plantings, living mulch—groundcovers and low spreaders—eventually take over the job, reducing the need to haul in material year after year. Keep mulch pulled back a couple of inches from crowns and stems to discourage rot.
To stretch rainwater, contour your bed gently so water slows and sinks. A shallow basin near a downspout can deliver moisture without running hoses. Where groundwater is high or clay dominates, planting slightly on mounds keeps crowns dry in winter. In hot, dry climates, watering in the early morning reduces evaporation and helps plants face the day’s heat.
Weed and pest management: less effort, more resilience
Weeds are less about the calendar and more about coverage. The best weed control is a dense, competitive plant community paired with mulch and attentive establishment. Plant closely—often spacing perennials 12 to 18 inches apart—so their leaves touch within the first two seasons. Any gaps that remain become targets for fill-in plants or groundcovers. Walk the garden weekly in year one and pluck newcomers while they are tiny. Ten minutes then saves hours later.
For unwanted insects, consider thresholds and plant diversity. A small nibble rarely requires intervention; many predatory insects arrive to keep things balanced when you plant a mix that includes umbels (like mountain mint) and daisy-type flowers (like asters). Encourage birds with shrubs, grasses, and water, and they will help moderate outbreaks naturally. If you do intervene, start with physical methods: hand-picking, water sprays, or pruning affected stems. Avoid broad-spectrum interventions that can disrupt helpful insects and the garden’s own checks and balances.
Diseases such as powdery mildew on bee balm are common in humid climates. Choose modern or regionally proven selections, plant with airflow, and accept some cosmetic issues as part of a living garden. Replace consistently troubled plants with sturdier alternatives rather than fighting a constant battle. The low-maintenance approach favors systems that avoid problems through fit and diversity rather than attempting to control every variable.
Habitat features: water, shelter, and nesting sites
Flowers feed pollinators, but habitat keeps them returning. Include a shallow water source such as a dish with pebbles so bees can drink safely. Clean and refill regularly, especially in summer. Leave some bare, sunny soil to give ground-nesting bees access to nesting sites. A few hollow stems left standing through winter provide nesting tubes for small bees and overwintering shelter for beneficial insects.
Resist the urge to cut everything down in fall. Many insects use dead seed heads and hollow stems as winter refuge. Instead, plan your garden so leaving stems looks intentional: cut some perennials to 12–18 inches in late winter and scatter the debris as a thin mulch. Leave ornamental grasses until late winter for structure and to feed birds. Add a brush pile in a discreet corner to shelter small wildlife, and you’ll see birds patrol the garden regularly in search of food.
Finally, layer in woody plants if you can: flowering shrubs like Ceanothus (in suitable regions), Itea, or Clethra offer early nectar, while fall-fruiting shrubs support birds. Even a single small tree can anchor a bed and provide shade to a bench—inviting you to linger and enjoy the show your habitat supports.
Small spaces and containers: balconies, courtyards, and parkways
No yard? You can still build a thriving mini habitat with containers. Choose at least 12–16 inch pots so soil doesn’t dry too fast, and group them to create a microclimate that buffers heat and wind. Mix a fine-textured grass like purple oat grass with a flowering perennial such as compact coneflower or dwarf agastache. Add a trailing herb like thyme to soften edges and provide nectar when it blooms.
On balconies, focus on long bloom windows and drought-tolerant species. Container-friendly choices include dwarf salvias, lavender, compact blanketflower, and small bee balm selections. Ensure pots drain, and water deeply rather than daily sprinkles. Mulch the pot surface with fine bark or small gravel to reduce evaporation. A small saucer filled with pebbles can become a safe water station. Even two to three containers can make a surprising difference, attracting native bees that forage across your neighborhood.
In narrow front strips and parkways, choose tough, upright plants that handle radiant heat. Grasses like little bluestem and perennials like yarrow, desert mallow (region dependent), and penstemon create a resilient, low-effort tapestry. Keep sightlines safe and respect local right-of-way guidelines. Once established, these strips can be among the most independent parts of your landscape.
Budget, sourcing, and phasing your build
Low-maintenance also means smart budgeting. Plants are the biggest expense, so stretch dollars by starting with smaller container sizes (like plugs or 4-inch pots) and letting them knit together. Ask local native nurseries for community packs tailored to sun or shade. Swap divisions with neighbors or gardening groups and propagate easy species like rudbeckias and yarrow at home. If you need instant coverage, mix a few larger specimens among smaller starts to reduce the temptation to overplant.
Phase your project to keep it manageable. Phase 1: kill the existing lawn or weeds using a cardboard sheet mulch or repeated smothering, then install edging and a path. Phase 2: lay out irrigation (drip or soaker) and plant the structural species and grasses. Phase 3: fill with perennials and groundcovers, mulch, and water-in deeply. A phased approach lets you learn the site before committing all resources and helps spread costs across seasons.
Buy local whenever possible. Regionally grown plants are more likely to be adapted to your climate and less likely to harbor pests that don’t belong in your area. Check tags for scientific names to ensure you are buying the species you intended. Some native plant cultivars (“nativars”) perform well and still support insects; others may be less useful, so consult local experts or research studies that compare insect use across selections.
Maintenance calendar: a simple yearly rhythm
A low-maintenance pollinator garden runs on a short, steady routine. Here is a simple calendar you can adapt:
- Late winter: cut back grasses and perennials to 12–18 inches, leaving some hollow stems. Rake debris lightly to create a thin mulch. Top up mulch in open spots.
- Early spring: plant any replacements or additions. Check drip lines or soakers for leaks. Spot-weed after rain when roots loosen easily.
- Late spring through summer: water new plants deeply, then less often. Weed lightly every week or two for ten minutes. Deadhead strategically if you want repeat blooms (leave some seed heads for birds).
- Late summer: shear back overly aggressive spreaders and re-edge borders. Assess gaps and note what bloomed when.
- Autumn: plant fall perennials or bulbs. Leave standing stems and seed heads for winter habitat. Add a thin layer of compost if soil organic matter is low.
Track your routine in a small notebook. Each year, the list gets shorter because your plant community becomes more self-sustaining. By year two or three, many gardeners find they spend more time observing than doing—exactly the point of designing for low effort.
Common mistakes and how to fix them
Even thoughtfully planned gardens need tweaks. Here are mistakes that add work and how to course-correct:
- Planting too sparsely: Gaps invite weeds. Fix by adding more of your groundcovers or repeating successful perennials to close space. Temporary annuals like California poppy can fill year one gaps in summer-dry regions.
- Too many species: A buffet of one-offs is hard to manage. Simplify by picking your ten best performers and repeating them. Donate extras or pot them up for another area.
- Mismatched plants: Sun lovers in shade or thirsty plants in dry zones force constant care. Transplant them to appropriate zones or replace with better fits.
- Overwatering: Frequent shallow watering creates weak roots and weeds. Switch to deep, infrequent watering and mulch well.
- Cutting everything down in fall: This removes habitat. Instead, leave stems and seed heads through winter. Tidy in late winter or early spring.
- Neglecting edges: Crisp edges make wild-style plantings look intentional. Re-edge once or twice a season and keep paths clear.
When something underperforms repeatedly, treat it as feedback, not failure. Replace it with a plant better suited to your conditions. Gardens evolve—your job is to guide the system, not force it into a shape that fights the site.
Build a low-maintenance pollinator garden step by step
Here’s a concise, repeatable workflow you can adapt to any yard:
- Observe the site: Map sun, shade, water flow, and wind. Note existing plants and features worth keeping.
- Draw a simple plan: Choose a bed shape, define a path, and pick a focal point. Split the area into sun/shade zones.
- Pick a short plant list: One grass, two to three mid-height bloomers, one to two tall accents, and one groundcover. Add bulbs for early nectar and asters/goldenrods for fall.
- Prepare the ground: Smother existing turf with cardboard and mulch or use a non-tilling approach to preserve soil structure. Install edging.
- Lay irrigation: Soaker hoses or drip lines under mulch save time and water during establishment.
- Plant in clumps: Use multiples and tighten spacing to cover ground in the first two years.
- Mulch and water-in: Two to three inches of mulch, then deep watering to settle roots.
- Set a light routine: Ten-minute weeding checks, occasional deep watering for year one, and a late-winter cutback. That’s it.
Stick to this sequence and adjust based on what you observe. The result is a garden that supports bees and butterflies, looks intentional, and fits neatly into a busy schedule.
Two example layouts you can copy
Sometimes seeing a pattern makes it easier to start. Here are two templates—one for a front yard bed, one for a compact patio—that you can adapt quickly.
Front yard bed (about 8 × 12 feet, full sun): Oval bed with a central clump of little bluestem (three to five plants), two drifts of coneflower and black-eyed Susan on either side, a ribbon of bee balm near the back for midsummer color, and a groundcover of creeping thyme along the edge to soften the border. Add stepping stones through the center for access. Repeat the same five species across the bed for coherence.
Compact patio trio (containers): Three 16-inch pots grouped together: one with a compact grass and a dwarf coneflower, one with dwarf agastache and trailing thyme, and one with lavender and a seasonal annual that blooms heavily for summer nectar. A shallow pebble saucer sits nearby for water. This trio fits on most patios and brings pollinators to eye level.
These patterns keep plant choice simple, focus on repetition, and create coverage. Swap species depending on your region and light, but maintain the roles: grass for structure, mid-height bloomers for color, groundcover for edges, and a watering strategy that favors deep roots.
Resources and community
Local knowledge shortens the learning curve. Seek out your state or provincial native plant society, master gardener programs, and regional botanical gardens. Many publish plant lists by ecoregion and hold spring and fall sales with volunteers who love matching plants to your exact site. Ask neighbors who have thriving, flower-rich yards about their experience—real-world tips often save you seasons of trial and error.
If you want more garden-life ideas and seasonal projects, explore the Garden Life section at Joel Lives. You will find practical guides, plant profiles, and examples from home-scale plots that show what works and why.
Bringing it all together
A pollinator garden is a partnership with a place. When you choose region-ready plants, plant densely, and set up a small, steady routine, you end up with a vibrant bed that nourishes insects and delights people with modest effort. The path to low-maintenance isn’t a trick; it’s a set of fit-first decisions and a willingness to let the garden be a little wild in the right ways. That wildness is exactly what pollinators need—and what makes your garden feel alive.
Start with a single bed, keep your plant list short, install a simple watering system, and give the garden its first year to knit together. The reward is a living tapestry that changes every week, invites butterflies to linger, and turns your yard—no matter its size—into a small but meaningful piece of habitat.